Prizes are well worth winning so get your thinking caps on as the entry deadline is the 16th September.
Tuesday, 17 August 2010
Beads and Beyond - September Edition
Prizes are well worth winning so get your thinking caps on as the entry deadline is the 16th September.
Thursday, 8 July 2010
Mixing Up Hadars Bronze, Steel and Copper Clays
Safety Instructions:
You are working with powdered metal - I personally use a dust mask AND barrier cream such as gloves in a bottle. (You normally only get one set of lungs and metal sensitivity rashes suck!)
2) Pour into a mixing container (this ones a little large the smaller ones are easier)
4) The mixture will begin to clump (looks like crumble topping at this stage, especially the Bronze....YUM)
5) Go easier with the water once you get to this stage ~ it's not long after that it really starts binding together.
6) Once it's reached the above stage then you can smoosh it all together put it between two plastic folder sheets and start rolling it out. (you can add a little more water to the sheet and fold/roll it in to make the clay extra pliable)
For firing instructions see Hadar Jacobsons Art In Silver Blog, she also has a video on mixing the clay & lots of gorgeous eye candy. :)
Wednesday, 7 July 2010
Anubis - Masters Registry
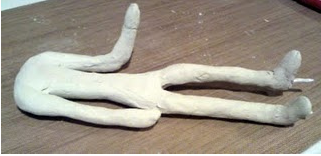
Whilst there's still more work to do, I couldn't resist giving you a peek at how my Anubis figure is progressing.... a far cry from his early days ;)
I 've put more pictures in my "Works in Progress" album on my Flickr photo stream.
Third fill and fire to go then I can start working on the base! need to be careful with the height now, at 11.8cms tall Anubis (+base) still need to fit in my kiln!
He currently weighs in a 151 grammes :)
Nic x
Saturday, 3 July 2010
Hadar Jacobson Class
Then you sand back to the layer that shows the two contrasting patterns. You'll find Hadars firing shedules on her Art in Silver site.

After mixing it produces the smoothest loveliest clay that is really flexible and a pleasure to work with (this is the same for all of Hadars clays).
There's so much more to say about Hadars class (I got so much out of it) so I'll post again soon with some more things that you might like to try :)
Nicola xx
Monday, 24 May 2010
Soldering Silver Clay onto a Sterling Cufflink Finding
Originally uploaded by muranosilver
This version shows the solder flowed on the base, then the cuff-link finding brought in ~ you'll find an alternative version on my Flickr stream showing the solder being put onto the finding and then brought onto the preheated PMC base.
(Use whichever works best for you)
Written Instructions for prep etc on on this blog post
http://pmctips.blogspot.com/2009/08/soldering-pmc-or-art-clay-silver-cuff.html
Happy making
Nic xx
p.s. The creaking noise was my chair, lol
Friday, 21 May 2010
Making a Silver Clay Finger Print Charm
Originally uploaded by muranosilver
Mini-vid tutorial on making a fingerprint charm.
Here are the Key points:
1) Make sure you have everything to cutters/rollers etc ready before your start.
2) Use thicker slats to allow enough clay for the finger to push into.
3) If the print doesn't look clean then roll it up, re-condition the clay and start again :)
4) Leave enough edge to drill a hole for the jump ring to go through.
5) Dry it thoroughly (a warm room overnight is good)
6) Sand & clean the edges (or use a baby wipe to clean up the edge if it's neat enough already)
7) For maximum strength kiln fire but if you haven't got one of those torch or hob fire in a VERY well ventilated area.
(Instructions for this are on this blog)
Happy Making
Nic xx
Wednesday, 19 May 2010
Texturing Silver Metal Clay
Texturing Silver Clay
Originally uploaded by muranosilver
3rd in the series Silver Clay - the very, very basics...
How to take a good impression using a texture mat + using a cutter
Nic xx
P.S> Feel free to suggest other topics for my 60-90 second video minis :)